Hello friends! Today I had a little window of time to just play, so I jumped into the Altenew Monthly Inspiration Challenge and pulled out some newer goodies… plus a few forgotten favorites from my stash.

This project is all about one idea:
👉 Start with what you already have, then build texture.
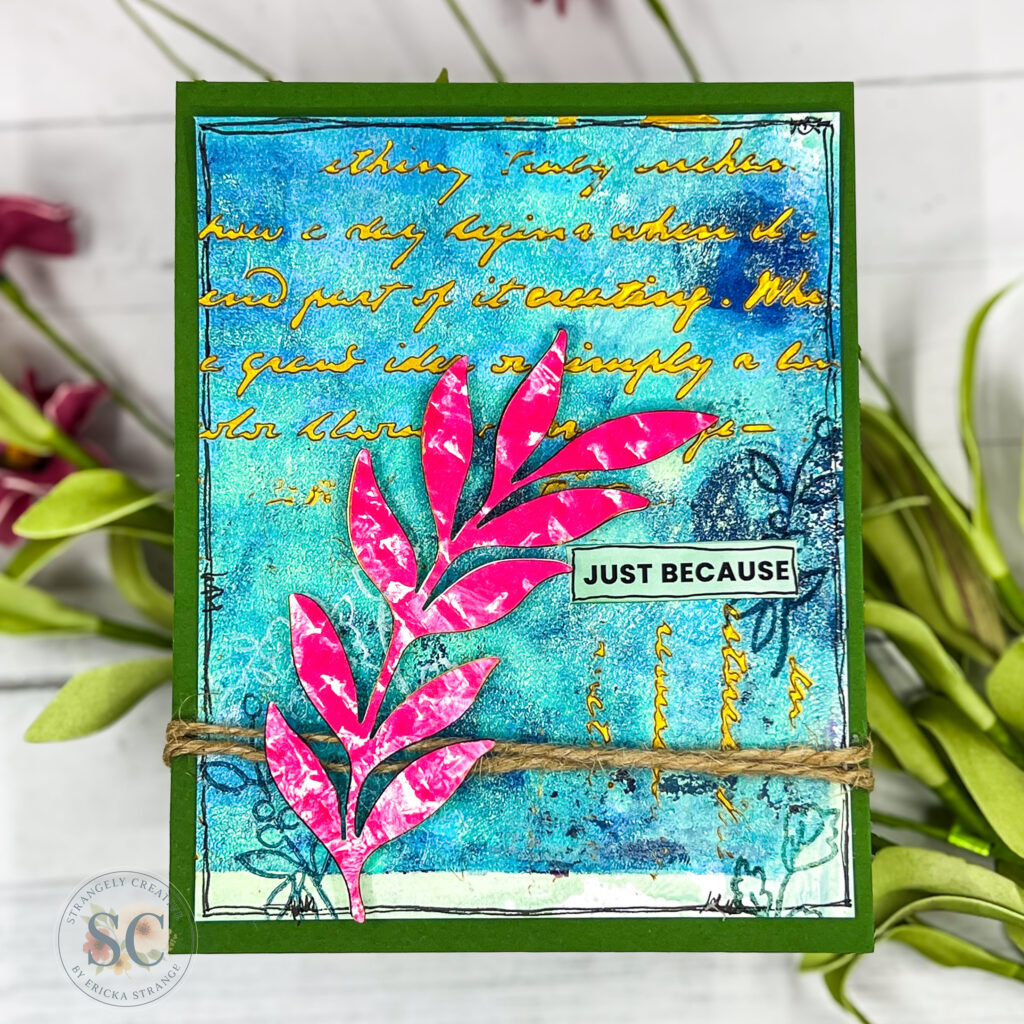
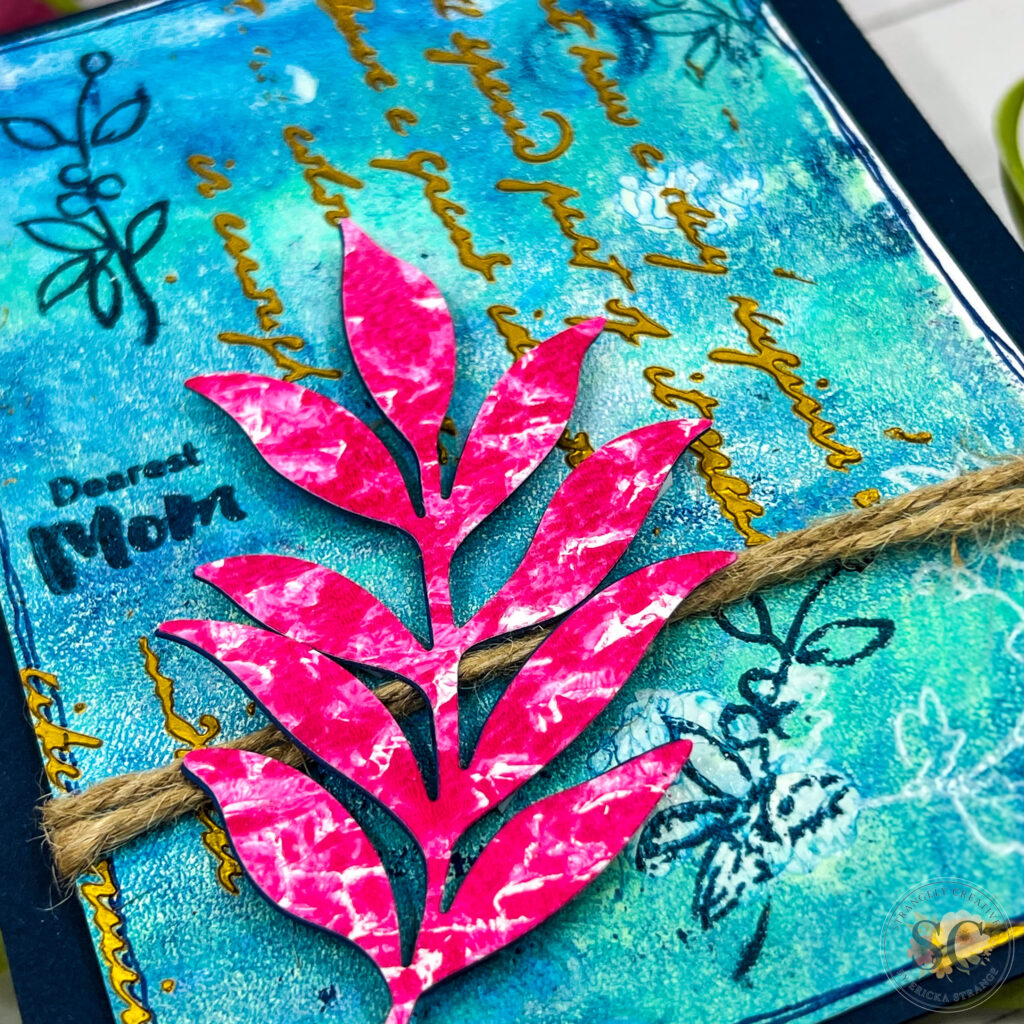
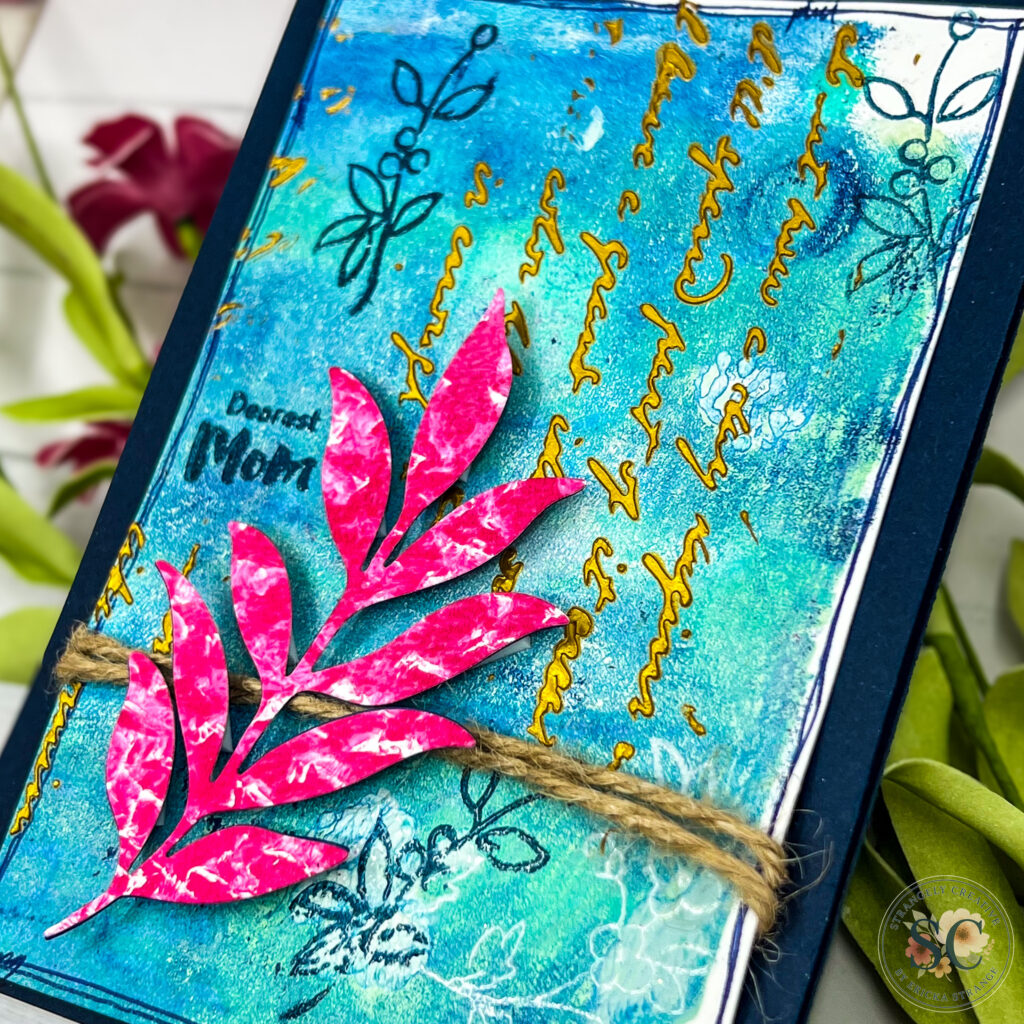
Starting with a Gel Print (Don’t Overthink It)
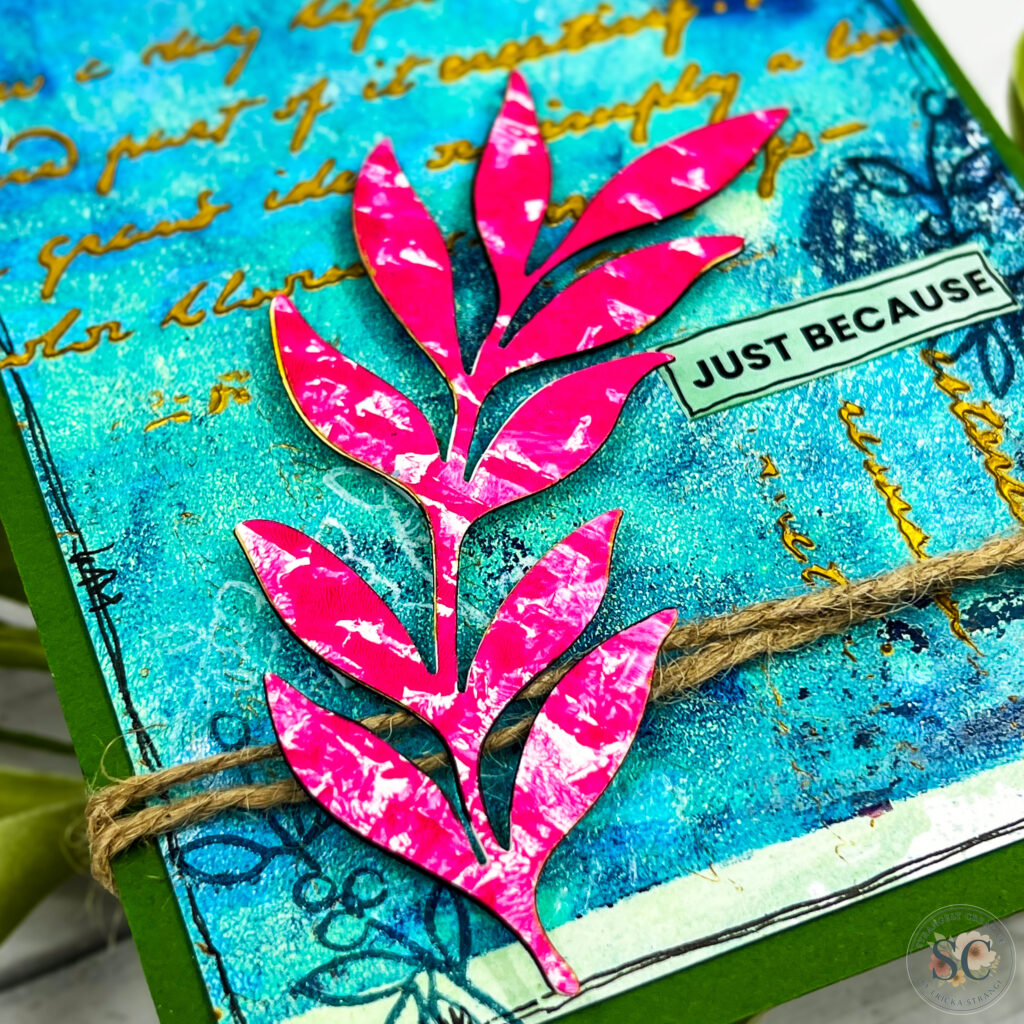
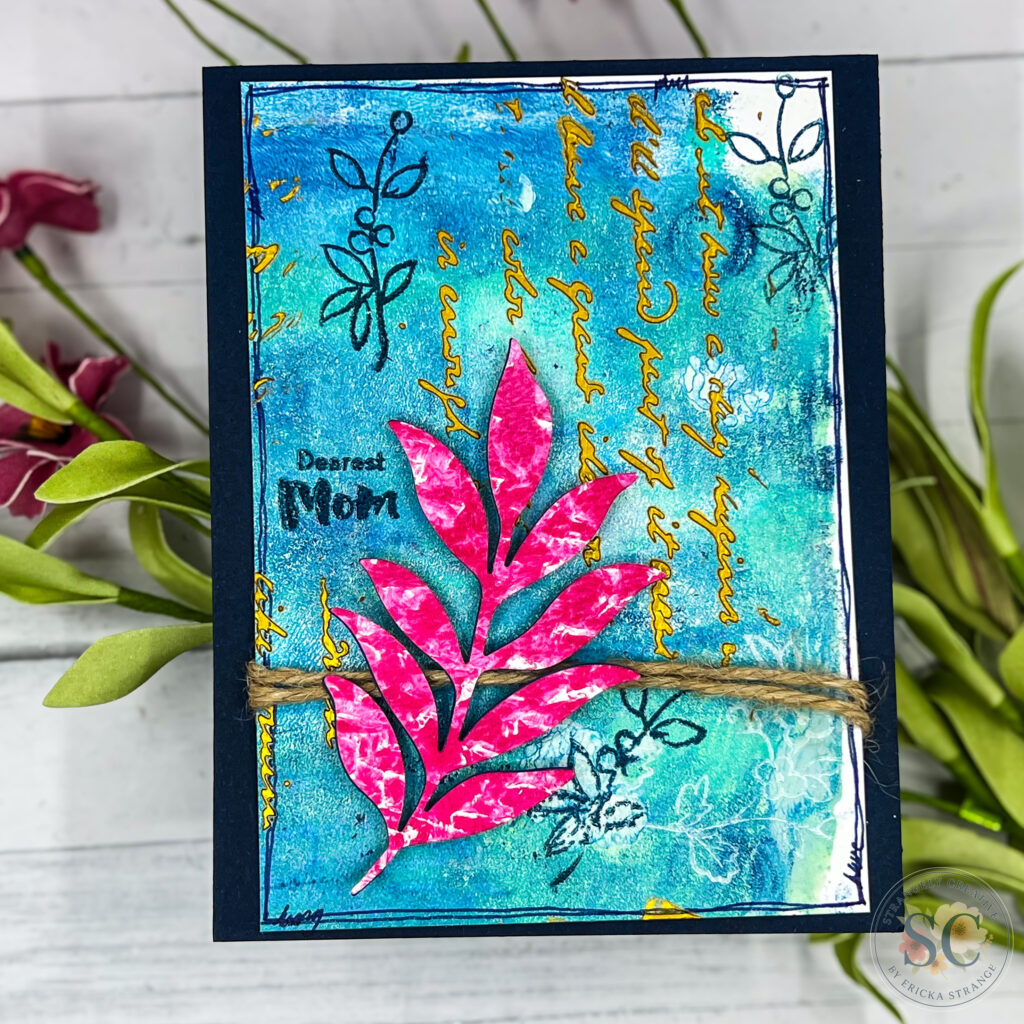
I began with a gel press print from my stash. No plan, just a base. From there, I layered on the beautiful Paper Echos stencil using Mayan Gold Shimmer Relief Paste. That raised texture paired with the soft metallic shine instantly elevated the background.
This is one of those steps that looks fancy… but is actually simple:
- Spread the paste
- Let the stencil do the work
- Walk away and let it dry
Building Texture with Stamping + Embossing
Once the paste dried, I reached for the small floral from the Precious Moments by Altenew.
I randomly stamped across the entire sheet using:
- Cloud White ink
- Twilight ink
Then heat embossed with clear powder to lock in that subtle shine and dimension.
💡 Quick tip: Work on a full sheet instead of a single card panel. You’ll get multiple cards from one session and your backgrounds feel more cohesive.
🌸 Creating the Focal Point
For contrast, I pulled in a bold element using the Decorative Swirl Die Set (retired, but still a favorite).
I die cut it from a bright pink gel print I had sitting in my stash, and it instantly became the focal point against the more textured background.
This is one of my go-to tricks:
👉 Busy background + bold simple die cut = balance
✂ Finishing Touches
To pull everything together, I added:
- A hand-drawn frame (my signature finishing touch)
- A bit of twine for a soft, rustic feel
- Foam tape behind the die cut for dimension
- A simple sentiment to complete the card
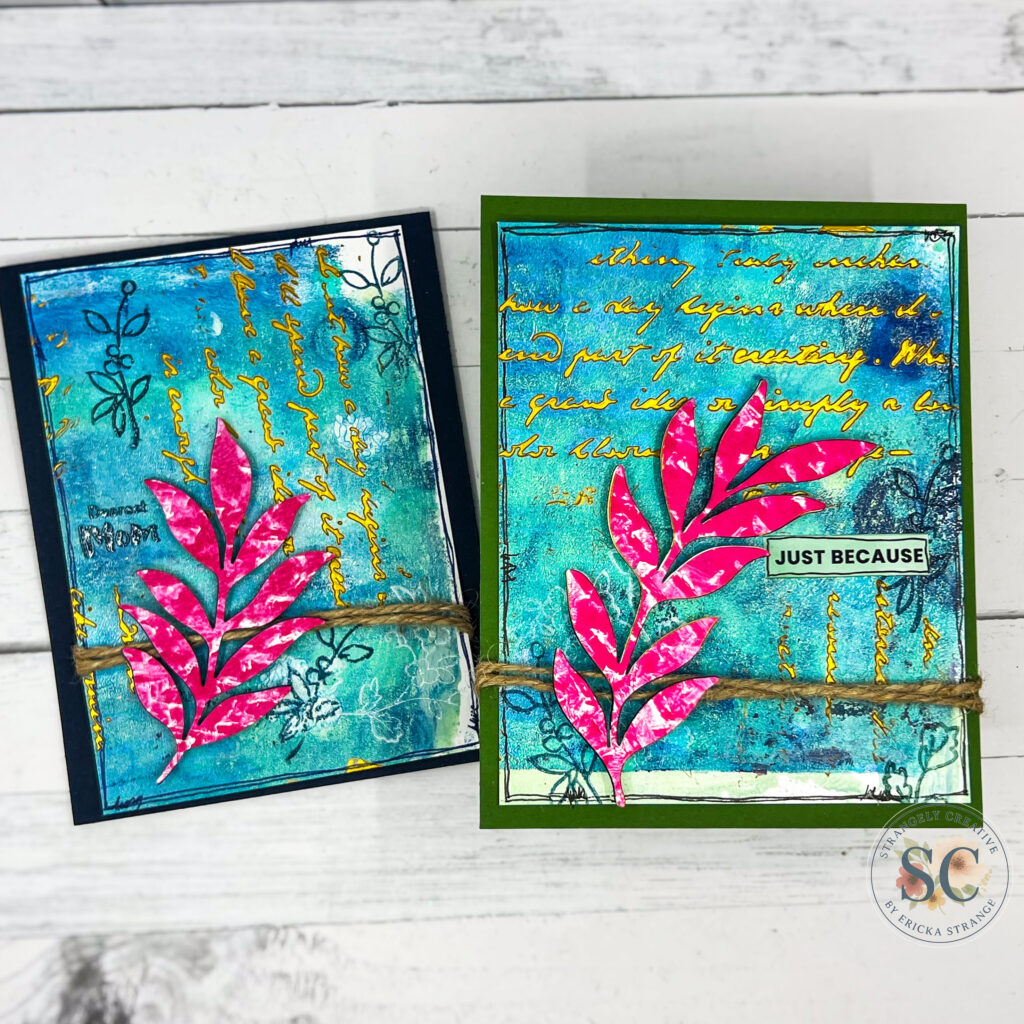
And just like that… one background turned into multiple finished cards.
💛 Why This Works
- You’re not starting from scratch
- You’re layering texture instead of adding more “stuff”
- You’re stretching one background into multiple projects
This is how you actually use your supplies instead of letting them sit.
👉 Your Turn
If you take one thing from this project, let it be this:
Pull out a full sheet background and just start adding layers.
Stencil. Stamp. Emboss. Cut it up.
No pressure. Just play.
Thank you so much for stopping by today. I hope this inspires you to dive into your stash and create something unexpected.
 Altenew – Precious Moments Shop at: Alt |
 Altenew – Paper Echos Shop at: Alt | SC |
 Altenew – Crystal Clear Embossing Powder Shop at: Alt |
 Altenew – Cloud White Shop at: Alt |
 Tsukineko – VersaFine Clair – Nocturn Shop at: AZ | TP |
 Tsukineko – Versafine Clair – Twilight Shop at: TP |
 Altenew – Shimmer Relief Paste – Mayan Gold Shop at: Alt |
 Gel Press – Reusable Gel Printing Plate Shop at: AZ | TP | Misc |
 Speedball – 2″ Brayer Shop at: TP | |