Hello friends! Today’s project is all about bold layers, rich texture, and that perfectly imperfect vintage vibe. If you love building depth one layer at a time, this one’s for you.
Step One: Gel Press Play
Everything started with my gel plate and a little creative curiosity.
I pulled out my collection of PaperArtsy Fresco Finish paints and Mattints and started experimenting. I layered both mediums directly onto the gel plate to see how they would interact in a single pull.
The standout combo –
- Weathered Copper
- Nutty Mattint
- Coastal
The Mattints gave that soft, aged translucency while the Frescos added body and texture. The result felt weathered, layered, and full of depth right from the first print.
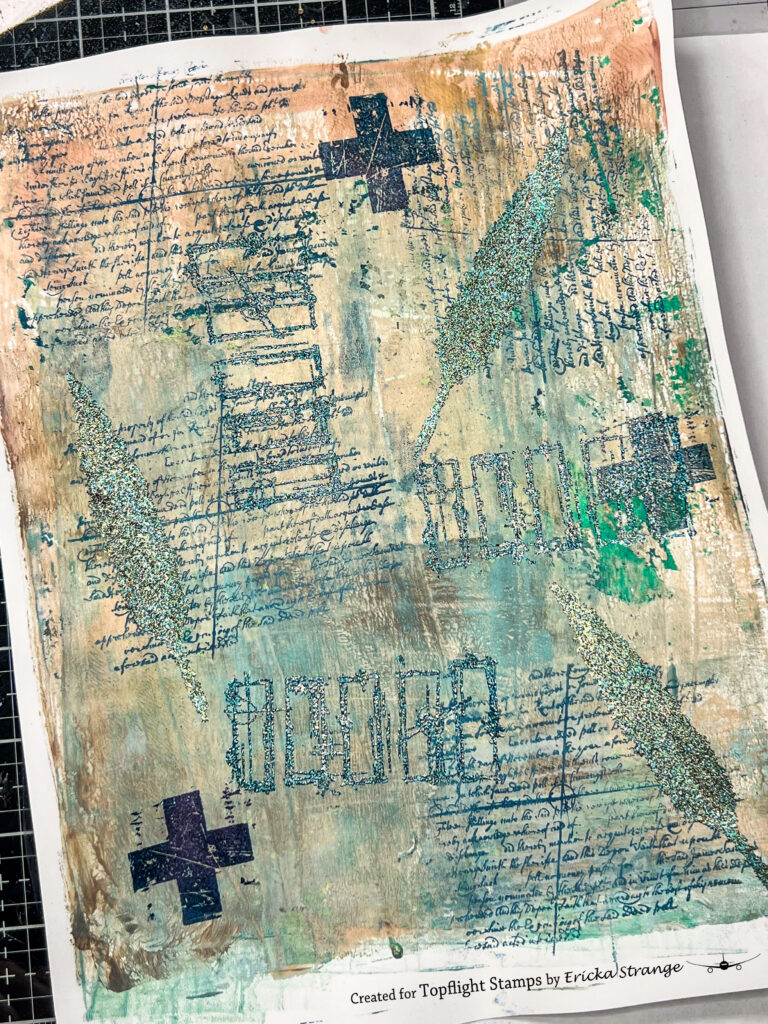
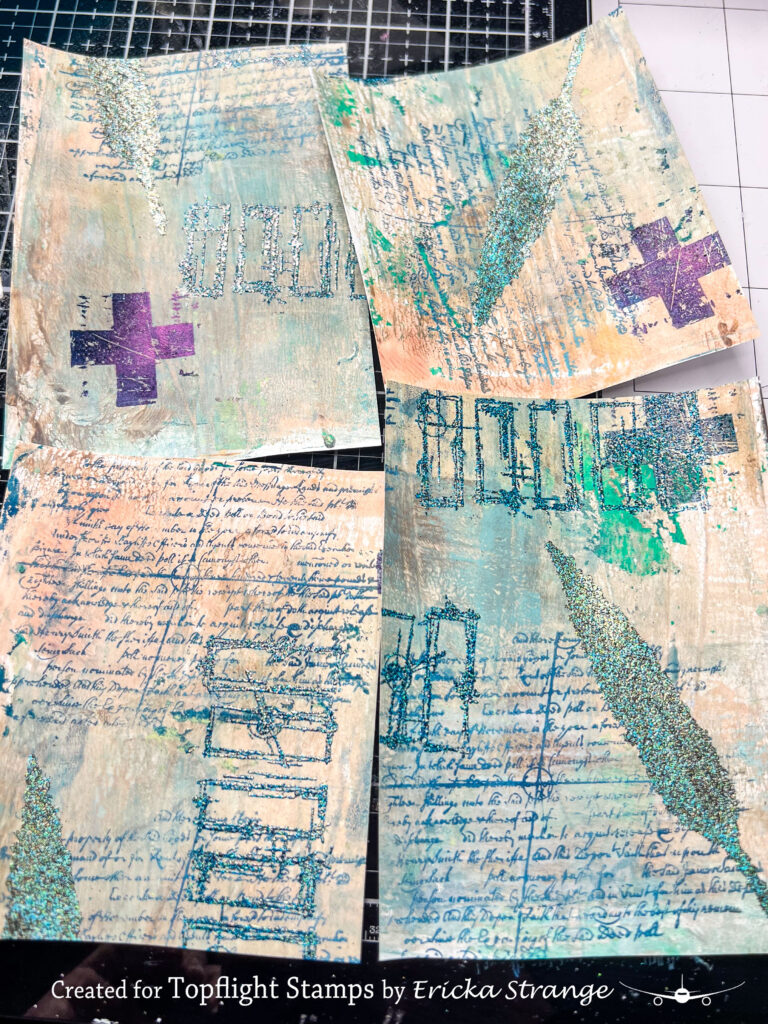
Step Two: Building the Layers
Once my background was dry, I reached for the Seth Apter 49 and Mini 70 stamp set.
Using Pea Coat Fresco paint, I stamped the first layer of imagery directly onto the print. That bold navy tone grounded everything beautifully.
Then came the shimmer.
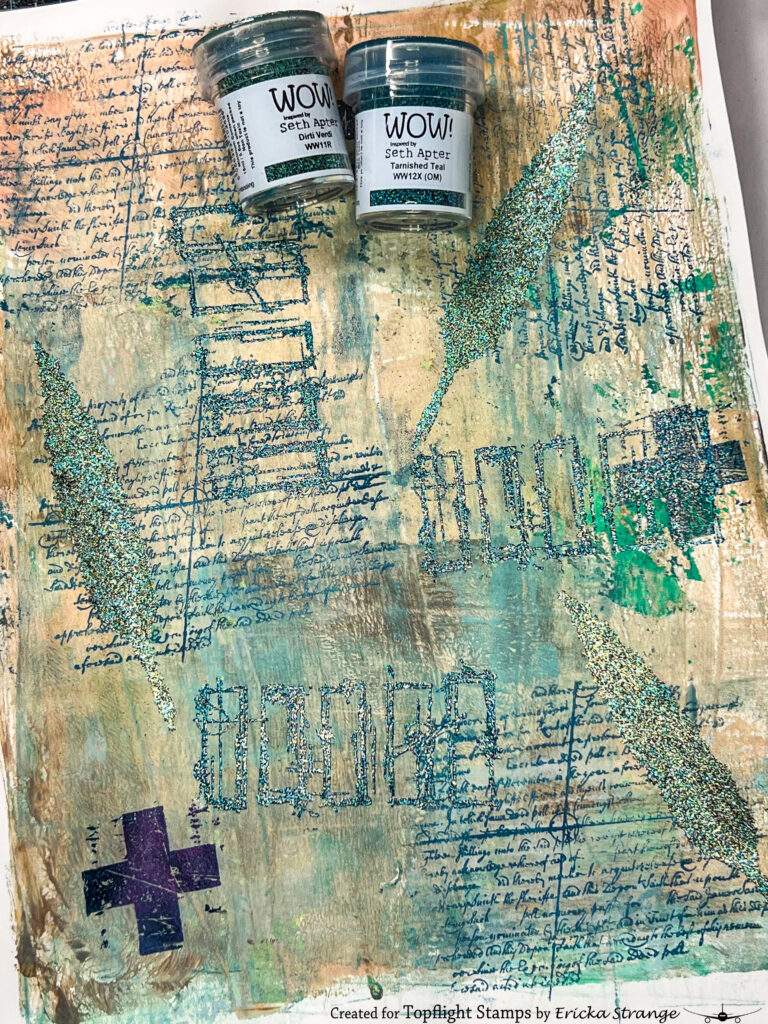
I added another layer using WOW! Embossing Powder in Tarnished Teal and Dirty Verdi. Those oxidized tones enhanced the aged metal feel already happening in the background.
For even more depth, I stamped a third layer using Versafine Clair Twilight. That darker ink pulled the eye inward and added contrast without overpowering the page.
Layer by layer, the texture just kept building.
Turning a Page into Panels
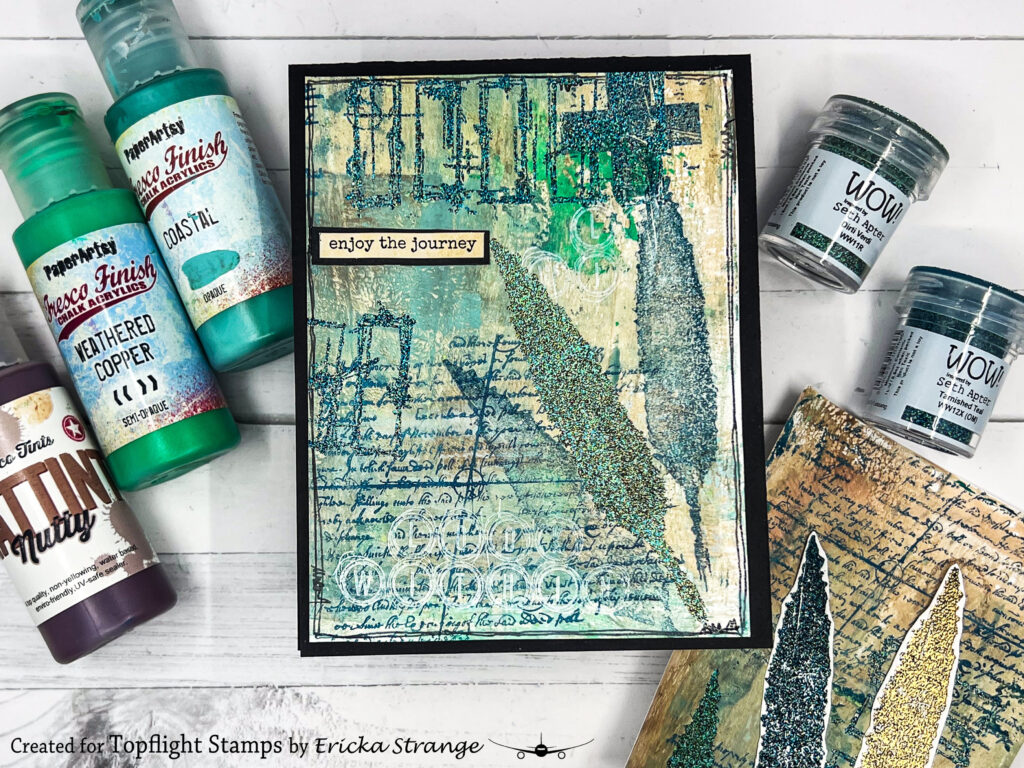
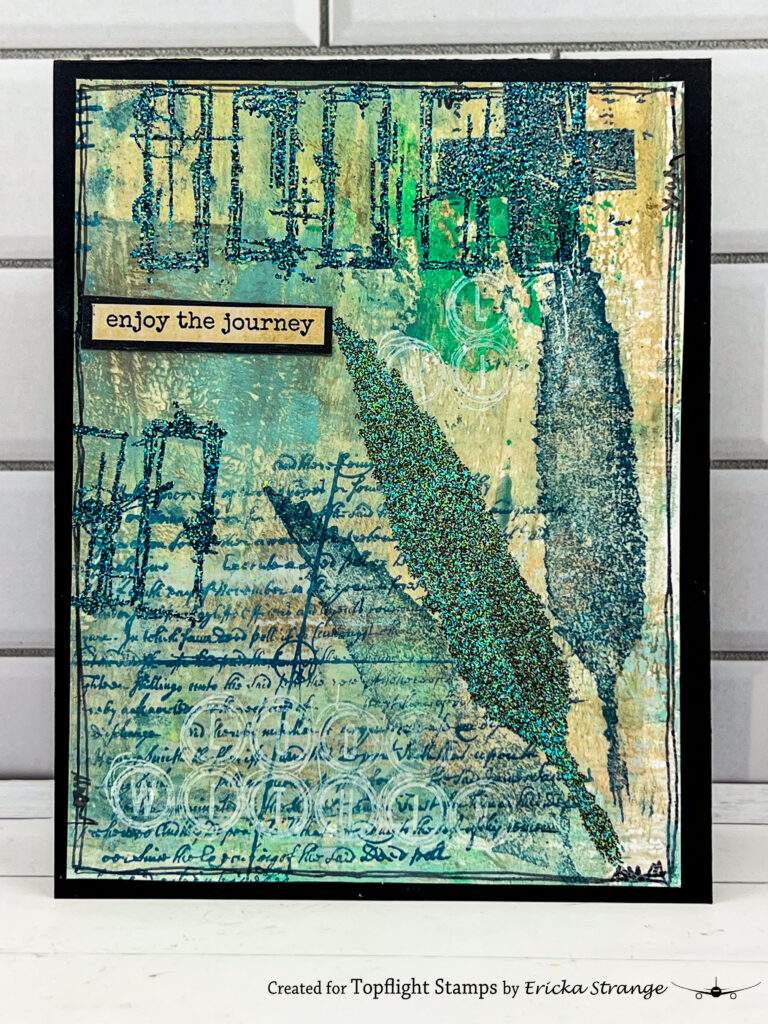
When I stepped back, I loved the finished page so much I didn’t want to hide it in a journal. So I cut it down into panels to create card fronts.
Once I selected a favorite panel, I added:
- Extra stamping for dimension
- More subtle texture
- A hand-drawn frame for that artsy finish
- A sentiment from the Lavinia Uplifting Collection
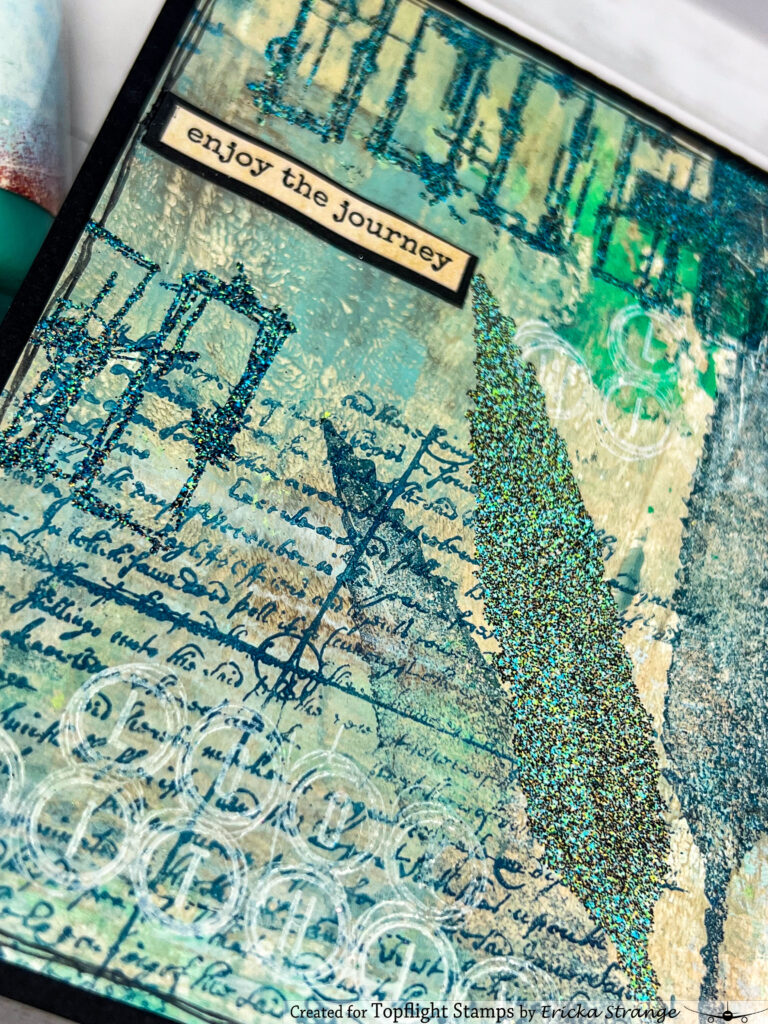
The Mattints give such a soft, vintage patina effect. It feels layered but cohesive. Moody but warm.
And the best part? I still have extra panels ready for future cards.
Layered backgrounds like this are one of my favorite ways to stretch supplies and create multiple projects in one sitting.
Thanks so much for stopping by. I hope this inspires you to pull out your gel plate and just play. Have a wonderful week creating.
Want to find the supplies I used? I have listed them below. (Compensated affiliate links used at no cost to you.) Thank you for your support!
 PaperArtsy – Seth Apter 49 Shop at: TP |
 PaperArtsy – Seth Apter Mini 70 Shop at: TP |
 WOW! Embossing – Clear Embossing Pad Shop at: WOW US | TP |
 WOW! Embossing – Seth Apter Dirti Verdi Shop at: TP |
 WOW! Embossing – Seth Apter Tarnished Teal Shop at: TP |
 Lavinia – Sentiment Stickers – Uplifting Collection Shop at: TP |
 Tsukineko – Versafine Clair – Twilight Shop at: TP |
 PaperArtsy – Fresco Chalk Paint – Tracy Scott Coastal Shop at: TP |
 PaperArtsy – Fresco Chalk Paint – Weathered Copper Shop at: TP | |
 PaperArtsy – Mattint Nutty Shop at: TP |
 Gel Press – Reusable Gel Printing Plate Shop at: AZ | TP | Misc |